
August 6, 2026
How to Use an eSIM for Travel and Avoid Roaming Fees
ESIMs offer a more secure and convenient way to stay connected while traveling internationally compared to physical SIM cards. They are embedded in your device and can't be removed if your phone is lost or stolen. You ca
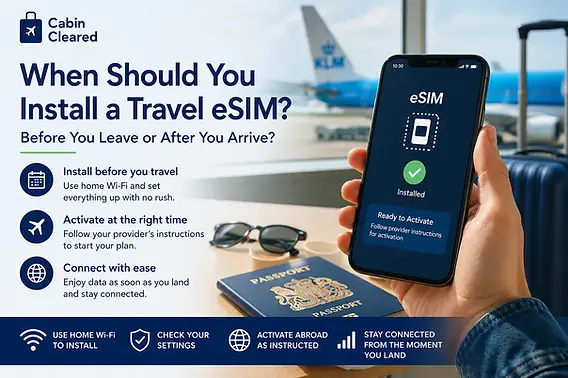
eSIMs offer a more secure and convenient way to stay connected while traveling internationally compared to physical SIM cards. They are embedded in your device and can't be removed if your phone is lost or stolen. You can have multiple eSIMs active simultaneously and store several profiles, making it easy to switch between your home number and a local or travel eSIM.
The problem
Searchers want a clear path for How to Use an eSIM for Travel and Avoid Roaming Fees.
Step-by-step
1. Check iPhone Compatibility and Requirements
Ensure your iPhone model (XS, XS Max, XR, or later) supports eSIM. Your iPhone needs to be connected to Wi-Fi or a hotspot for activation, though some eSIM-only models in certain regions can activate without Wi-Fi. If your iPhone has a SIM tray, you can use both a physical SIM and an eSIM.
2. Understand Roaming Charges
Roaming charges apply when you use your phone outside your home network's coverage area. These charges can be for data (per megabyte or gigabyte), texts (per message), or calls (per minute plus a connection fee). They occur because your provider pays a foreign provider to use their network, and this cost is passed on to you.
3. Explore Options to Avoid Roaming Fees
To avoid roaming charges, you can rely on Wi-Fi hotspots, purchase a daily roaming plan from your provider, buy a local SIM card at your destination, or get an eSIM.
4. Purchase a Travel eSIM
You can purchase a travel eSIM from a local carrier in the country you're visiting or from a worldwide service provider. Many offer prepaid plans with local phone numbers. You can buy these online before you travel or in person upon arrival. Carriers will provide digital activation steps, such as using a QR code or their app. Identification may be required.
5. Install and Activate Your eSIM
Follow the step-by-step installation instructions provided by the eSIM provider, often through their app or website. Once installed, you can turn on your eSIM line when you arrive at your destination to instantly connect to a local network. You can choose to use the travel eSIM by itself or alongside your current eSIM.
6. Manage eSIMs on iPhone
You can store 8 or more eSIMs on your iPhone and swap which ones are active through Settings. If you have two eSIMs active, you can designate one for your home number and another for your travel destination. When traveling, you can select your travel eSIM for data. If you use both lines, your travel eSIM will be used for data, but your home eSIM might still incur roaming fees.
7. Turn Off Your Primary Carrier's Data Line (Optional)
To ensure you're not billed by your primary carrier when using a travel eSIM, you can either remove the physical SIM card or adjust settings. On iOS, go to Settings > Cellular/Mobile Data and disable 'Turn On This Line' for your primary SIM. Alternatively, turning off data roaming can help, but you might still be charged for texts and calls. Check with your carrier for specifics.
8. Returning Home
With iOS 26, your iPhone may automatically turn off your travel eSIM and reactivate your home SIM upon returning to your country. If this doesn't happen automatically, manually ensure your primary line is turned on in Settings > Cellular and turn off any unused travel eSIM lines.
Practical tips
An eSIM is more secure than a physical SIM because it cannot be removed if your iPhone is lost or stolen. You can store multiple eSIM profiles on your device and easily switch between them. Using a travel eSIM can be an affordable way to stay connected abroad, often with prepaid data plans. FaceTime and iMessage can continue to work on your home line even when using a travel eSIM for data.
Common pitfalls
Relying solely on Wi-Fi can be limiting as you need to stay within coverage areas and cannot guarantee network security. If you use both your home eSIM and a travel eSIM for data, you might still incur roaming fees from your home eSIM. Some Android devices may not allow you to turn off data roaming for a specific SIM, applying the setting to all SIMs in use. An iPhone purchased in China mainland may have restrictions on using eSIMs from carriers outside of China mainland.
FAQs
What is roaming?
Roaming allows you to use your phone for calls, texts, and data when you travel outside your mobile provider's coverage area. Your phone connects to a foreign provider's network, but this service comes with additional charges.
Why are roaming charges so expensive?
Roaming charges are high because your mobile provider has agreements with foreign providers to use their infrastructure. These agreements include international tariffs, currency conversion fees, and other charges that are passed on to you.
Can I use an eSIM with my existing carrier plan?
Yes, you can roam internationally with your existing carrier using an eSIM. Check with your carrier if your data plan includes international roaming or if they offer affordable travel passes or plans. International roaming with an eSIM functions similarly to using a physical SIM.
How do I check if my iPhone is unlocked?
To check if your iPhone is unlocked, go to Settings > General > About. If 'No SIM Restrictions' appears next to Carrier Lock, your iPhone is unlocked.
What is an eSIM?
An eSIM (embedded SIM) is a digital SIM card built into your device during manufacturing. It identifies you as a mobile subscriber and connects you to a carrier's network digitally, eliminating the need for physical SIM cards.
Book & Explore
Get a travel eSIM with YesimDestination Guru may earn a commission when you book through links on this site, at no extra cost to you.
Comments (0)
No comments yet. Be the first!